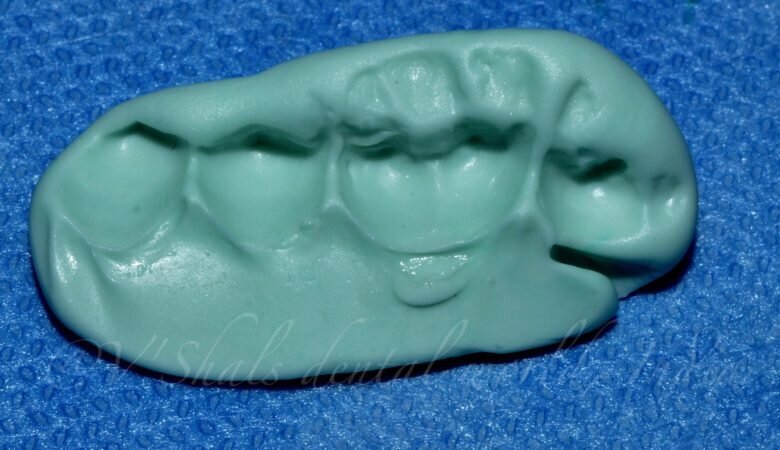
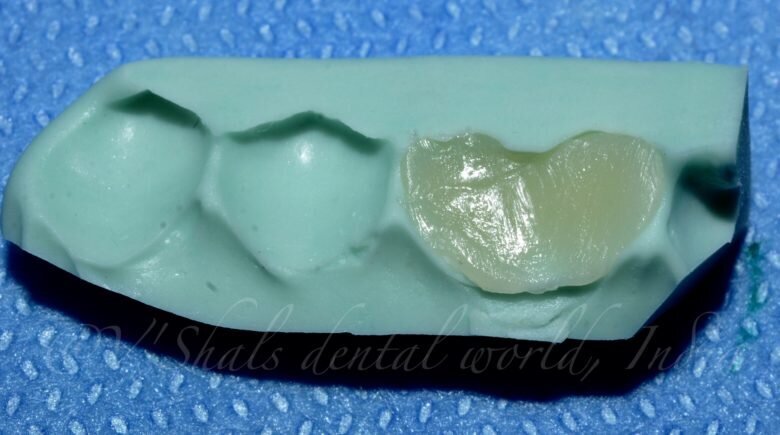
An idea of Gaetano Paolone and Salvatore Scolavino and the style italiano team, is the "Custom Shield technique”. In this technique the height and the anatomy of the cusp are registered before its reduction through the use of a silicone index. This index is then used to mold directly the cusp to exactly as it was before reduction.
When treating cavities involving the undermined buccal, palatal or lingual cusp, if the thickness is less than 2mm reducing cusp's height is usually recommended . Either a direct or indirect restoration is then planned for the patient.
If we plan to restore the cusps with direct composite restoration, it often gets very difficult to restore cusp's height and shape in a free-hand method, often resulting in either under-filled or over-filled restoration requiring lots of occlusal adjustment and finally loss of anatomy and shape.
With the "Custom Shield technique” the height and the anatomy of the cusp are registered before its reduction through the use of a silicone index. This index is then used to mold directly the cusp exactly as it was before reduction.
In this article I present a case of a restoration of maxillary first molar using the custom shield technique.
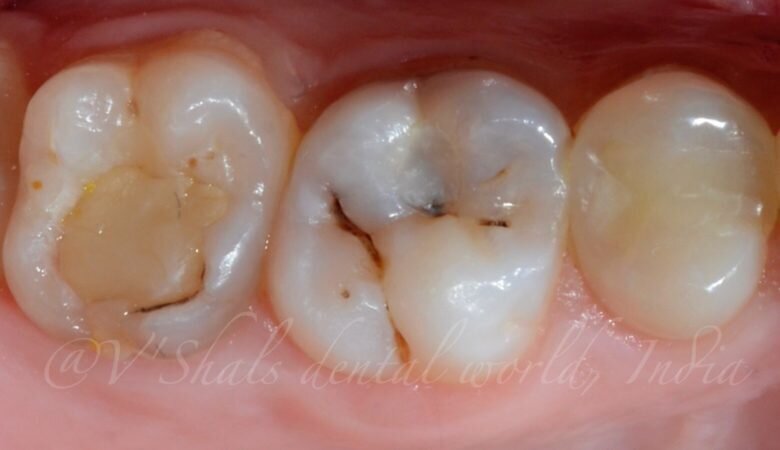
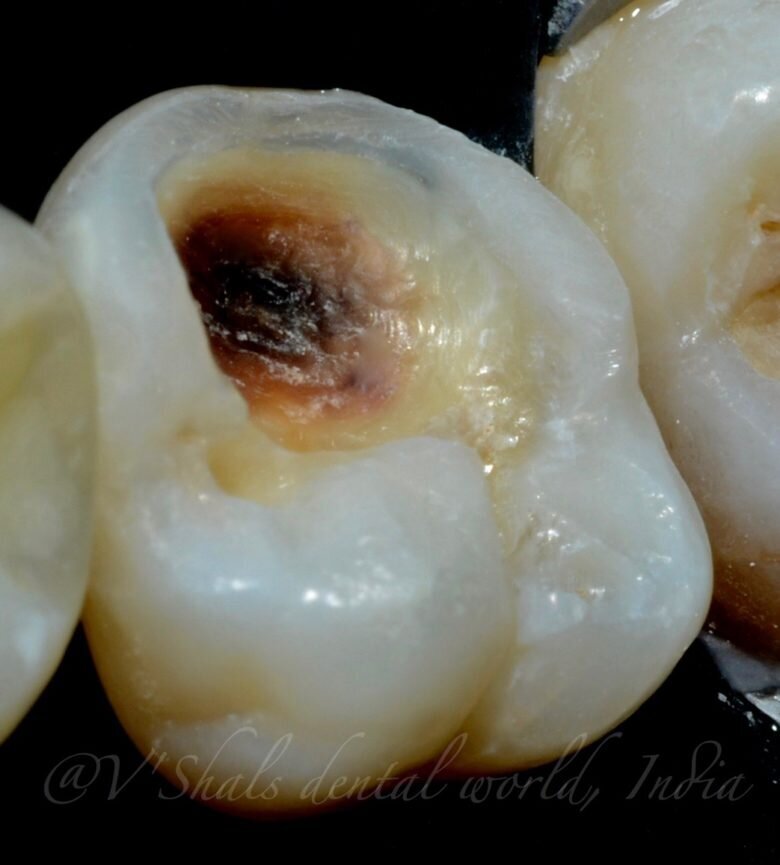
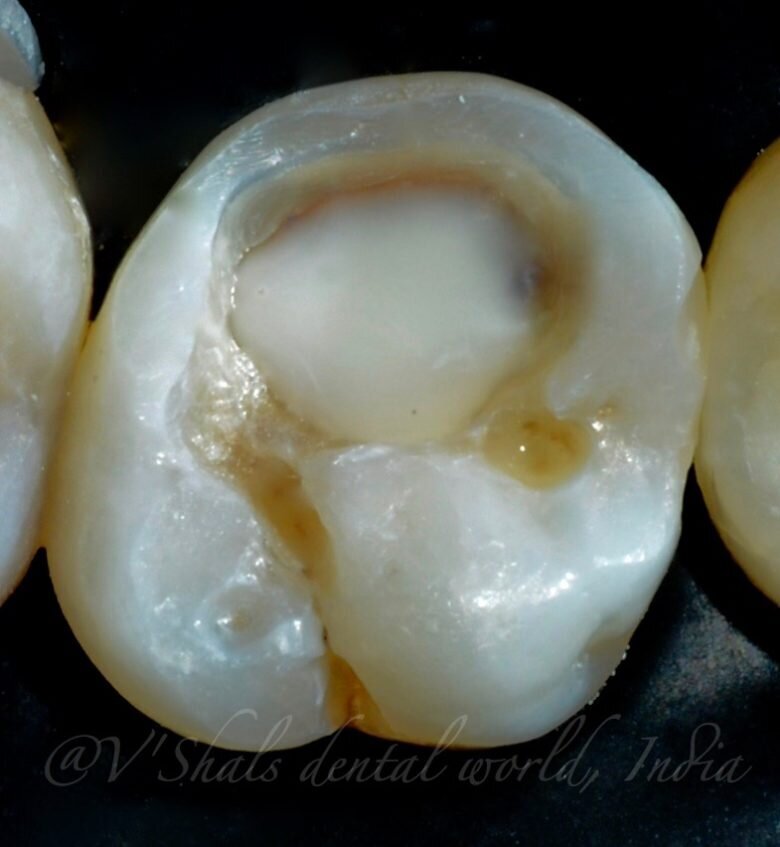
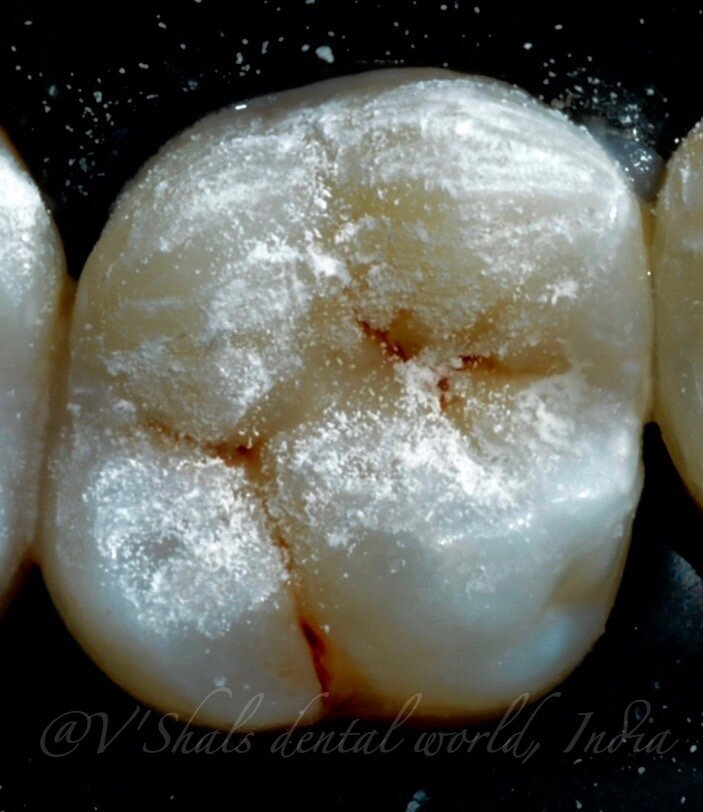
Fig. 1- Initial situation: the black hue under the buccal cusps of maxillary first molar is an indication that removing the decay will result in loss of buccal cusps anatomy.
Fig. 2- Rubber Dam isolation is Performed.
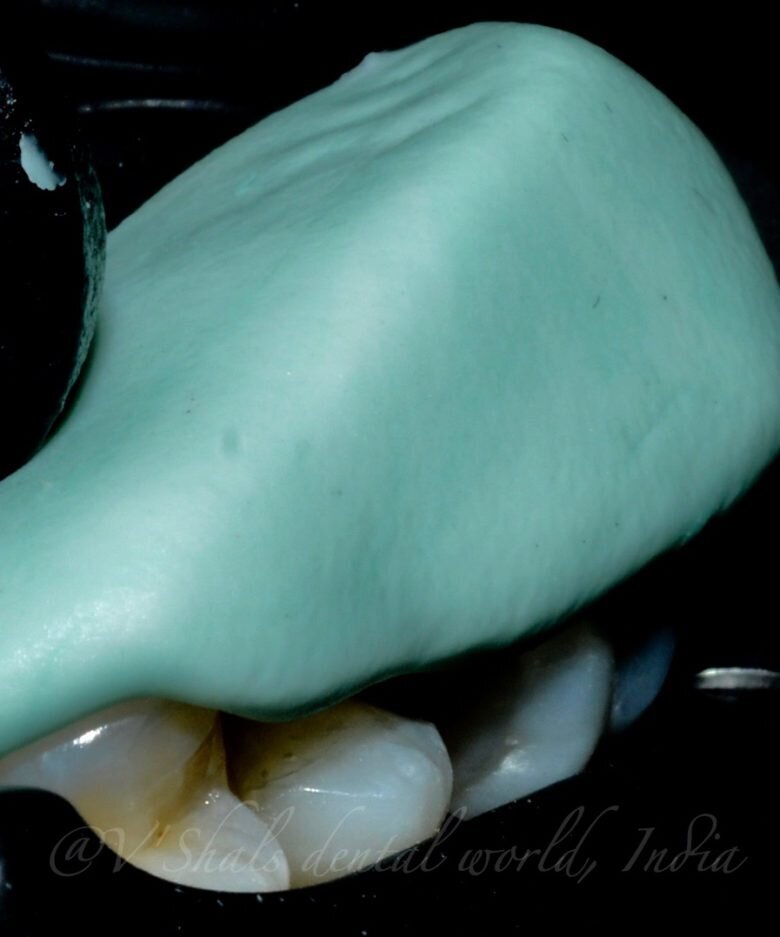
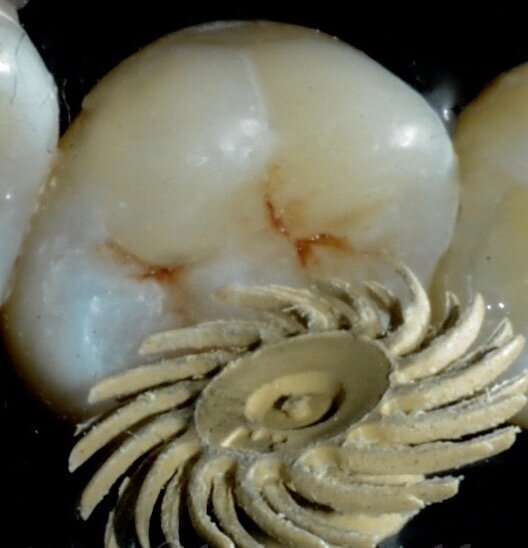
Fig. 3 - The custom shield is made by placing a small amount of putty material buccally and occlusally.
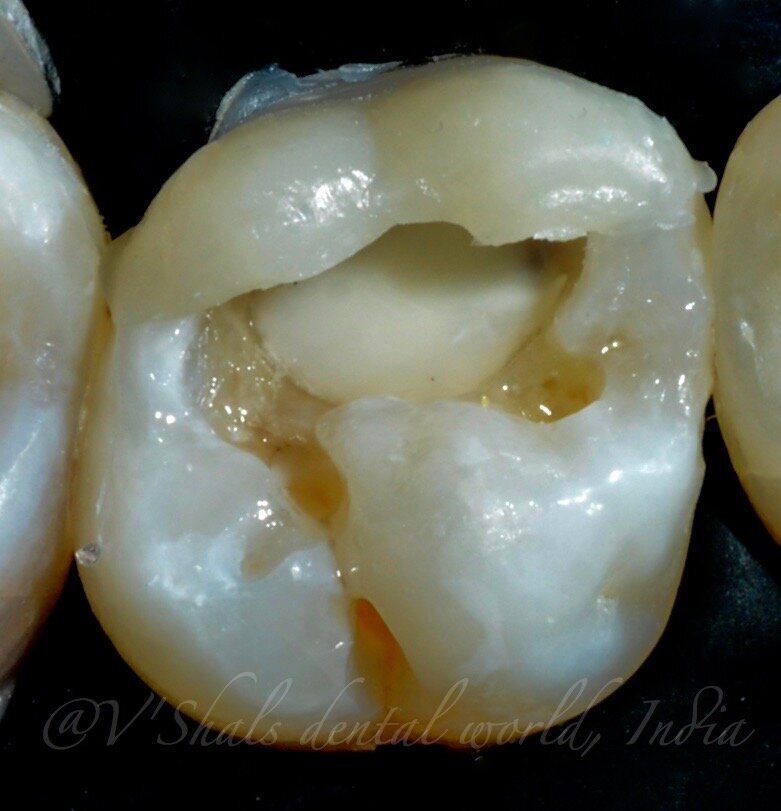
Fig. 4 - The cavity is cleaned till affected dentin is reached and confirmed with chemical dye check and with sharp spoon excavator, the weak cusps are reduced .
Fig. 5- The deep cavity is lined with RMGI liner (Vitrebond, 3M ESPE).
Fig. 6- Selective etch and bond application ( single bond universal, 3M ESPE)
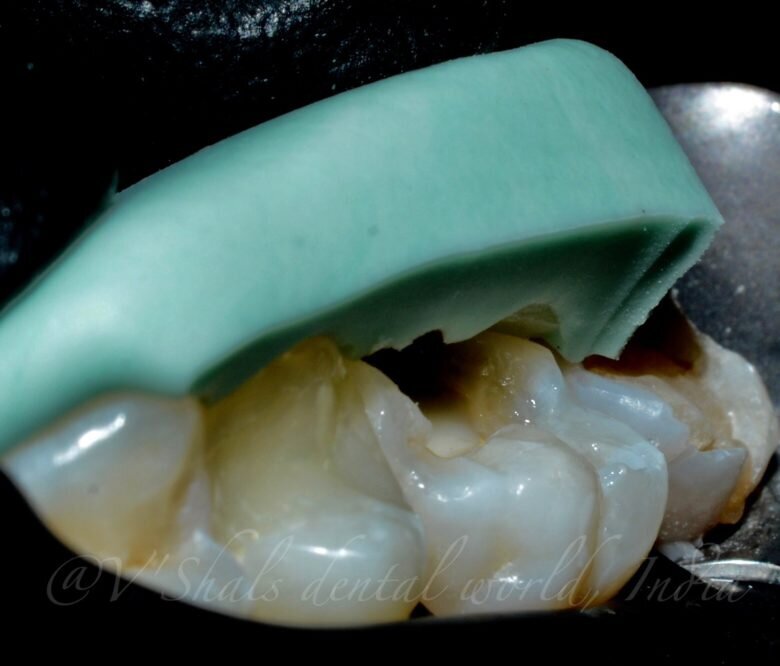
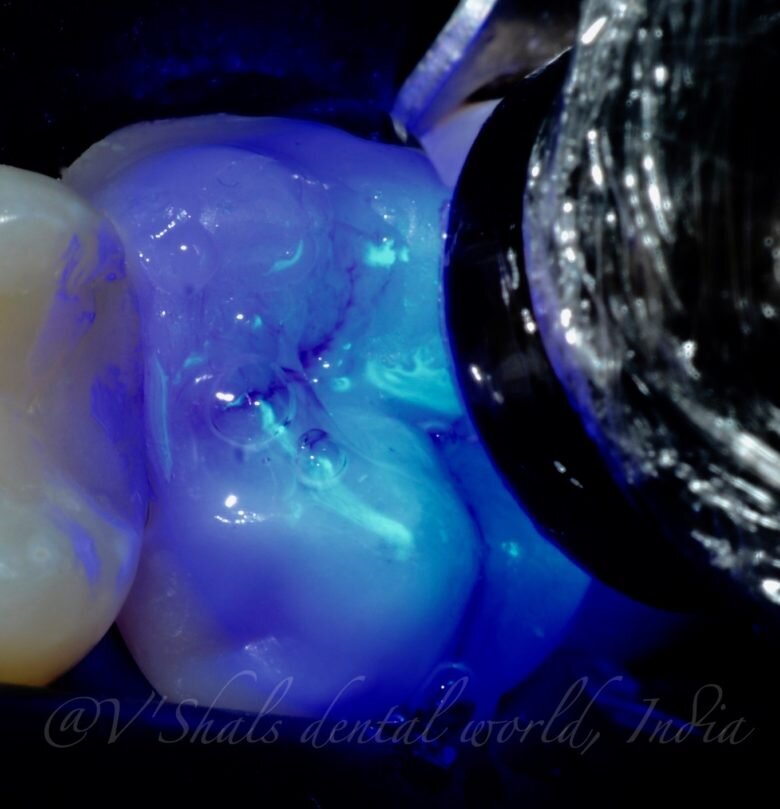
Fig.7- The composite is placed on the custom shield and adapted on to the tooth and photo-cured.
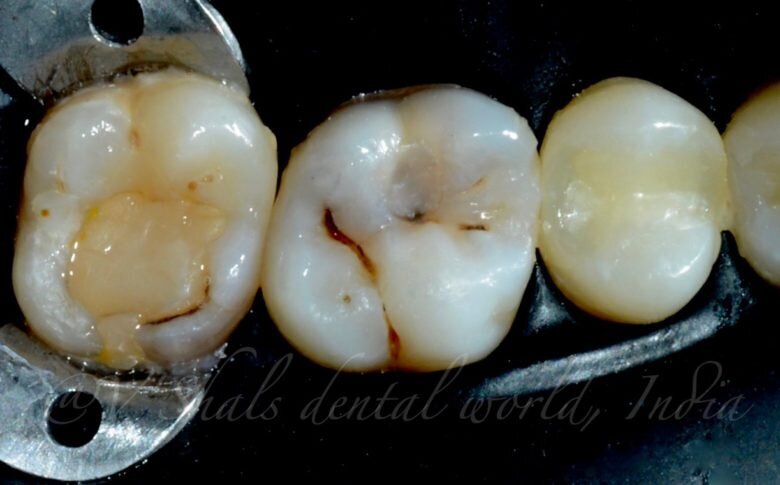
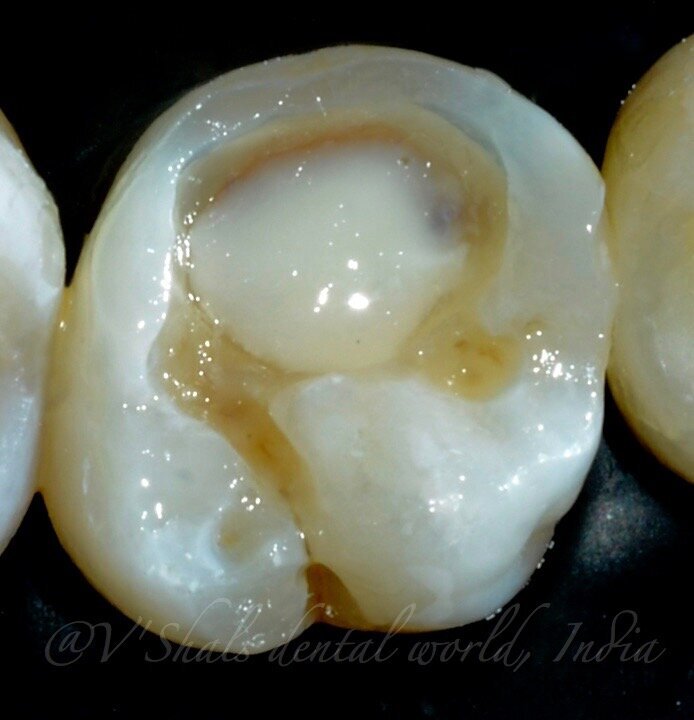
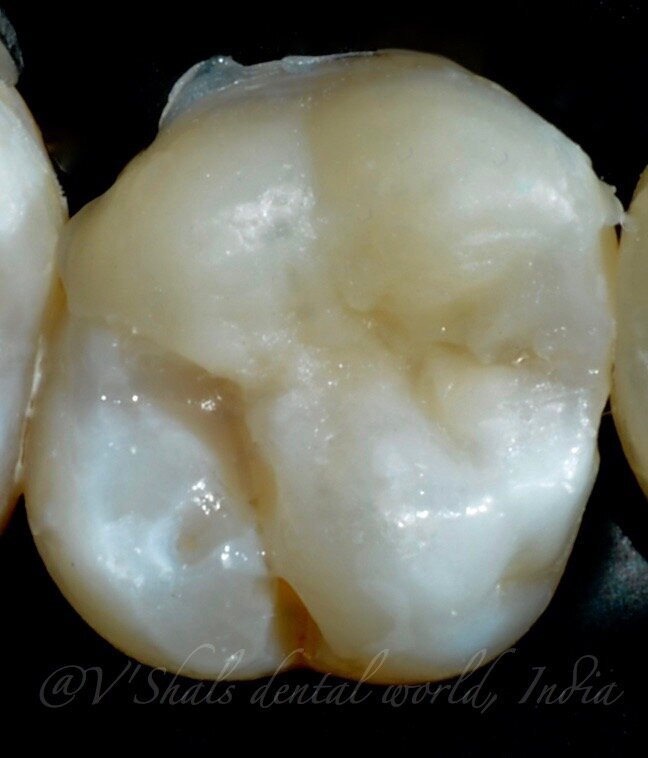
Fig. 8- After curing the buccal cusp anatomy is restored.
Fig. 9- The rest of the tooth is stratified cusp by cusp incrementally following natural anatomy.
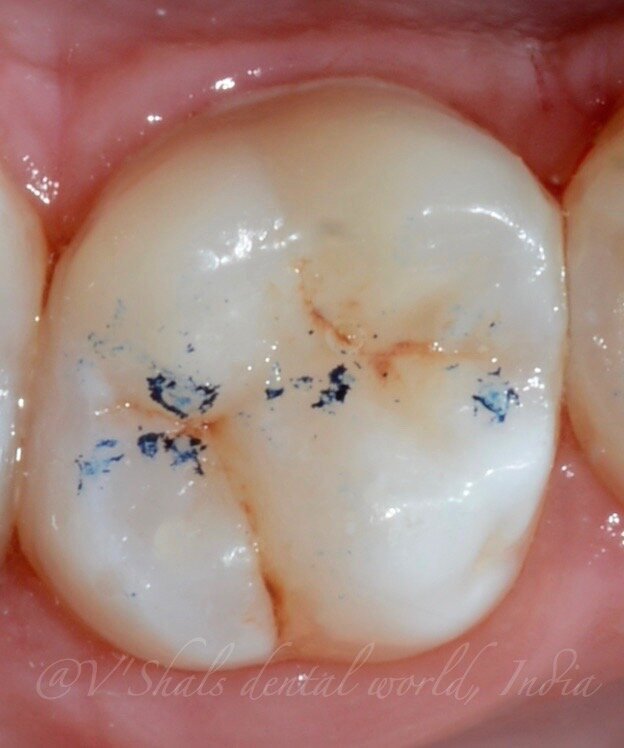
Fig. 10- Some brown stains are added to define the sulcus and add depth .
Fig. 11- Finally top layer is cured under glycerin and then finished grossly with 100 micron burr in slow speed and soflex discs( 3M ESPE)
Fig. 12- Pre polishing is done with so flex spinals ( 3M ESPE)
Fig. 13- Occlusion is checked and adjusted and final finishing and polishing is done.
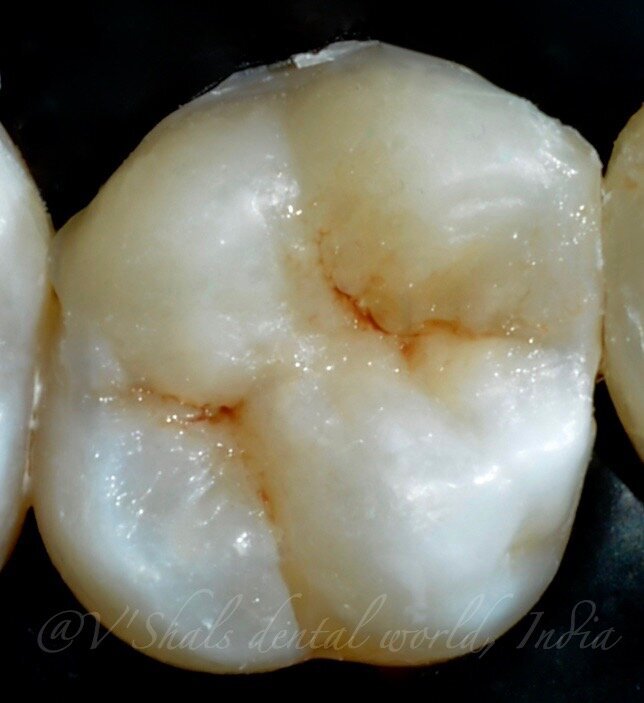
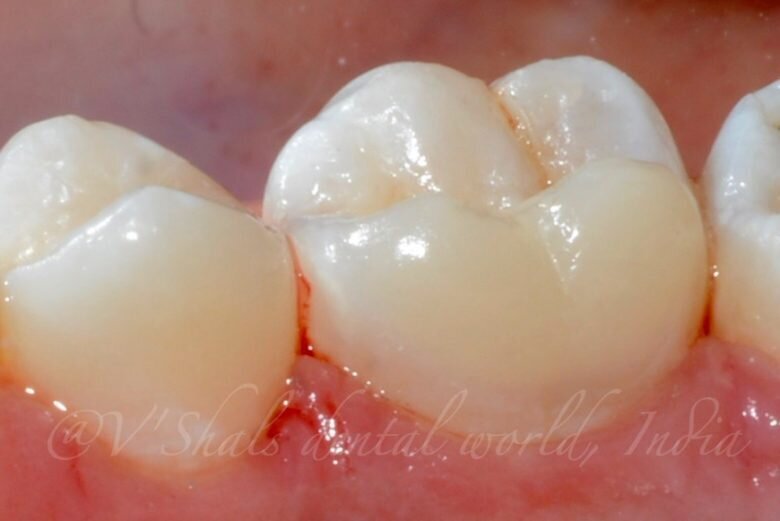
Fig. 14- Final result showing well integrated composite restoration following natural tooth contours
Fig. 15- Two weeks post-op
Embarking on a pioneering journey, a new artificial intelligence (AI)-driven bibliometric analysis 1 has unveiled the scientific landscape of the Socket ...
This article illustrates a case where an implant was placed immediately after extraction using the Socket Shield Technique. Retaining the buccal fragment of...
The Conceptual Hybrid Flare (CHF) technique is a novel technique developed to revolutionize the cleaning and shaping of root canals making the endodontic ...
Vanini described an anatomical stratification technique that goes beyond the typical three dimensions (hue, chroma, value) of color. The technique, ...
Diastema Closure with direct composites is one of the most minimally invasive and often performed procedures in aesthetic and restorative dentistry. Yet, it...
Composite resins have been the choice of restorative material for more than 20 years. Most clinicians have mastered the layering protocol for anterior teeth...
Dr Udatta Kher has made significant contributions to the field of implant dentistry. He has developed a wealth of clinical evidence on Socket Shield. He has...
ZURICH, Switzerland: Clinical evidence has established dental implants as a great treatment option to replace missing teeth. However, even with the high ...
Christian Coachman, the founder, and CEO of the Digital Smile Design (DSD) company, is well-known for combining his advanced skills, experience, and ...
Dr. Nisha Damle Deshpande interviews Dr. Jordi P. Manauta of Style Italiano for their front-wing technique developed for diastema closure with direct ...
Live webinar
Tue. 26 May 2026
9:30 pm IST (New Delhi)
Live webinar
Tue. 26 May 2026
11:30 pm IST (New Delhi)
Live webinar
Wed. 27 May 2026
5:30 pm IST (New Delhi)
Live webinar
Thu. 28 May 2026
9:30 pm IST (New Delhi)
Live webinar
Mon. 1 June 2026
10:30 pm IST (New Delhi)
Live webinar
Wed. 3 June 2026
10:30 pm IST (New Delhi)
Live webinar
Thu. 4 June 2026
11:30 pm IST (New Delhi)

 International / International
 Brazil / Brasil
 Canada / Canada
 Latin America / Latinoamérica
 USA / USA
 Austria / Österreich
 Bosnia and Herzegovina / Босна и Херцеговина
 Bulgaria / България
 Croatia / Hrvatska
 Czech Republic & Slovakia / Česká republika & Slovensko
 France / France
 Germany / Deutschland
 Greece / ΕΛΛΑΔΑ
 Hungary / Hungary
 Italy / Italia
 Netherlands / Nederland
 Nordic / Nordic
 Poland / Polska
 Portugal / Portugal
 Romania & Moldova / România & Moldova
 Slovenia / Slovenija
 Serbia & Montenegro / Србија и Црна Гора
 Spain / España
 Switzerland / Schweiz
 Turkey / Türkiye
 UK & Ireland / UK & Ireland
 China / 中国
 Pakistan / Pākistān
 Vietnam / Việt Nam
 ASEAN / ASEAN
 Israel / מְדִינַת יִשְׂרָאֵל
 Algeria, Morocco & Tunisia / الجزائر والمغرب وتونس
 Middle East / Middle East

 Prof. Anton FriedmannRegister now1CELive webinar
 Dr. Anthony Viazis DDSLive webinar
 Dr. Sergio FlorencioLive webinar
 Dr. Ioannis VergoullisRegister now1CE


—full protocol: a case report")


It’s innovative work..Addition to dental practice..Thanx a lot for sharing